Recipes*Crafts*Photographs

Sunday, April 20, 2014

2x4 Easter Bunny Crafts


Happy Easter Y'all!!  Here is the last installment in my Easter craft series.  Finished just this morning (just in the knick of time huh?!?!).  It took me a while to figure out how I was going to do the ears.  And then there were some issues with the pink fabric!!  (Like the first kind I bought at Michaels ended up being see through satin, so I had to find different fabric)  But they are finished and I love the way they look!!

I started with 8" and 4" 2x4's that I painted white.

I cut the ears from burlap and coated them with Modge Podge so the would be stiff and stand up.  I used pink bottom fabric for the inside of the ears.

I hand painted the face using paint pens for the eyes and mouth and a dauber sponge and ink for the cheeks.

I think this little guy turned out so cute!!

I cut the nose from chipboard and painted it pink and highlighted it with a white paint pen.  I used craft wire for the whiskers.

I hot glued the ears to the back and the nose/whiskers to the front.

"Hoppy" Easter Everyone!!

I just love the way the faces turned out on each of these guys!!

I hope that everyone had a wonderful Easter today celebrating with family.

I have some great ideas for cards for the upcoming holidays.  Can't wait to share them with you.  Also am going to be finishing up some extra patriotic crafts for my family and to sell that I started last year.  I'm also working on some centerpieces for a party my sister is having next weekend for everyone to meet my new nephew that my sister and brother-in-law just adopted from South Korea.  The theme is Hungry Hungry Caterpillar.  I'll share my centerpieces once they're finished.

Until next time...

Saturday, April 5, 2014

Wooden Easter Chicks


So here is the last installment of my wooden Easter crafts using a plain egg template series.  I LOVE the way these chicks turned out.  I may even like them more than the eggs I previously posted.  And they were fairly simple to make.  Again they were made from the same egg form that my dad cut out for me.  I found templates online for the feet and hand drew the template for the beak.  I cut the beak and feet out from chipboard.  The hair is cut from a feather craft boa.

First I painted the egg yellow and then covered the front with scrapbook paper, distressed the edges, and sealed it with Modge Podge.  The feet and beak were cut from chipboard, and then covered with scrapbook paper, distressed, and sealed as well. 

The eyes were painted on with a paint pen (best invention ever for small detail work), the hair was cut from a feather boa, and then finished with a ribbon.

This gal was made the same way, only done in purple.  I decided to do pig tails for her.

Isn't she so CUTE?!?!

My pair of finished Easter Chicks.  Perfect companion to my Eggs.

My Eggs and Chicks all together!!  I absolutely love the way they all turned out!!

I hope you enjoyed my Easter Chicks.  So easy to make, but yet so cute!!  The last Easter craft I'm working on are Easter Bunnies made from 2x4s.  Just have to finish some burlap ears for them.  Will post the finished products later!!

Another shameless plug for you to visit my Etsy Store and check out what I have for sale.

You may also follow me on Facebook.  Please visit and "like" my page!!  Pretty please!!

Until next time...

Monday, March 31, 2014

Wooden Easter Eggs #2


Happy Monday!!  So here is the second post in my Wooden Easter Egg series.  I really like the way that they each turned out.  I like that I decorated both sides of each egg so I can change up the look when I want to.  I'm thinking about buying some spanish moss to fill my wire birdcage with and putting the eggs in there.  I think that would look cute on top of my media cabinet.

For this egg I painted the edge pink and then covered each side with scrapbook paper.
I really like this pink damask print.
I put 2 different colors of ribbon along the bottom and decorated it with Easter egg stickers.
The best thing was, I already had all the ribbon and embellishments!!
The other side I covered with a "Happy Easter" print paper.
I put ribbon along the top of this egg. 
And a bunny and Easter basket along the bottom.
Happy Easter!!

I hope these eggs get you in the mood to start getting ready for Easter if you haven't already.  Last weekend I even put up some Easter decorations in my living room.  I'm just excited that this year I get to enjoy them for longer than 1 week, since last year Easter was right after St. Patrick's Day.  I can't wait to share the Easter chicks with you as well.  They turned out so cute.

Until next time...

Sunday, March 30, 2014

Wooden Easter Eggs #1


So I saw this idea on Pinterest earlier this winter and asked my dad if he would be able to cut the wood, and he said he would be able to.  So in February I found a template for an Easter egg online that we modified so the bottom would be flat.  He cut them out and sanded them for me.  Then it was up to me to turn them into Easter eggs.

I decided to decorate both sides materials to, that way I could change it up as I wished.
I painted the edge green and covered each side with scrapbook paper and sealed it with modge podge.
I decorated each side with Easter embellishments.
I though this Easter basket and eggs were cute, and I already had them  from a previous project. 
This side I decided to use foam letters to write "eggs" with.
I love the dragonfly embellishments that I had laying around that I was looking for the perfect project to use them in.
I think the ribbon and bows is the perfect way to finish off this egg.

I made one other egg that I will post later.  Also finished up 2 Easter chicks made from the same wooden egg form.  I will post on those later as well.  I also made 2 cards that I'll post later as well.  I can't believe how time is flying.  Easter will be here in a few short weeks.  So much to do, and it seems like so little time to get it all done.  Hopefully the snow here on the East Coast is done until next winter!!  I can't wait for warm spring days when I can open the windows and air out my house!!

I have also opened up an Etsy Store where I can sell my handmade crafts.  Please stop by and visit and share with your friends.  I also have a Facebook page as well.  Please visit, "like" the page, and share with your friends.

Until next time...


Sunday, March 16, 2014

2x4 Leprechaun Hat Craft Project


Happy St. Patrick's Day!!  I finished this 2x4 leprechaun hat just in time!!  I've been so busy lately working on a bunch of cards (will post them later) and some crafts for Easter, that I almost forgot to finish this craft.

I painted the wood pieces green.  I couldn't find any green scrapbook paper I liked, so I made my own.  I used a plain green paper and used a round stamp dauber to stamp VersaMark ink all over.  This gives it some texture without being too busy.  I distressed the edges of the paper before I glued them on.

I sealed the paper with Modge Podge an then glued the wood pieces together.

I wrapped the middle piece with black ribbon.

Finally I cut out a shamrock from green felt, distressed the edges, and glued it on.

I hope you enjoyed this craft.  Happy St. Patty's Day everyone.  More cards and Easter crafts to come soon!!

Until next time...

Saturday, March 1, 2014

Stampin' Up! Owl Punch Cards


So I've decided that I think I want to dive into card making and open up an Etsy shop to sell them.  I purchased the Stampin' Up! owl punch this week because I've seen so many cute ideas on Pinterest using this punch.  So today I decided to whip up my first 2 cards.  I think that they turned out pretty cute.  I can't wait to make more!!

I've also been addicted to Ebay as well this week.  I purchased some embossing folders and Stampin' Up! stamp sets from there this week that I used with these cards.

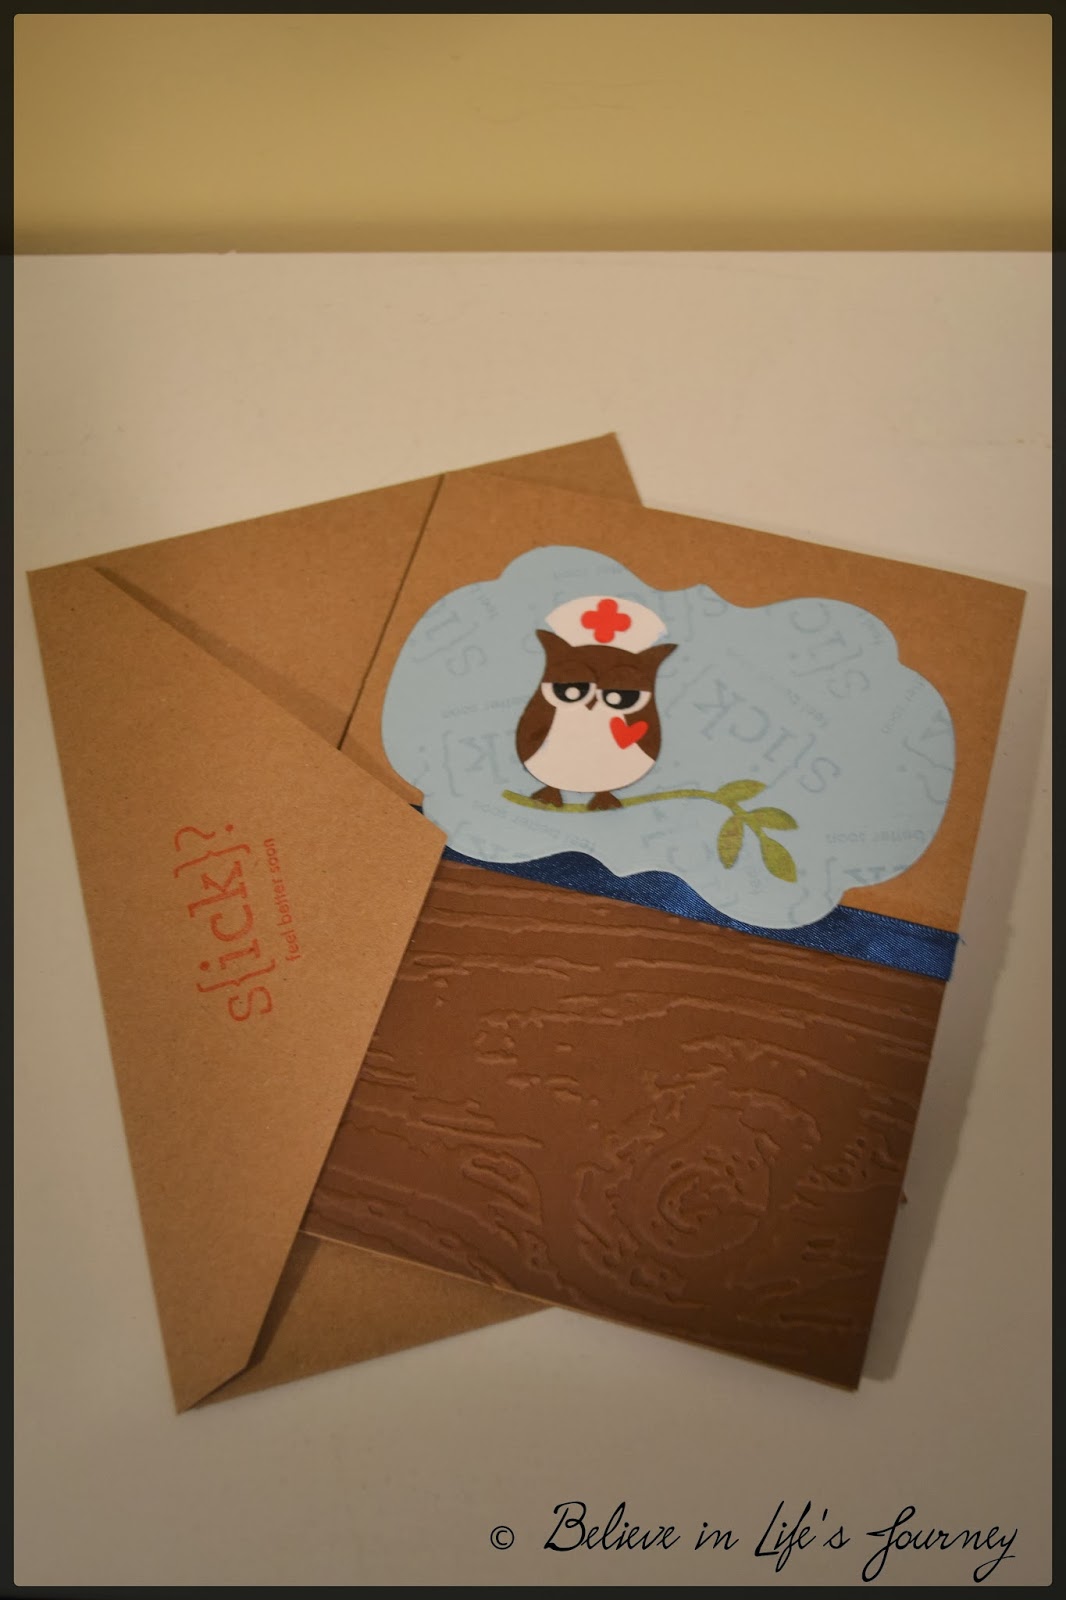
I used a Kraft paper card base and used a wood grain embossing folder and dark brown paper to make it look like a tree trunk.  I decorated it with navy blue ribbon.

I used the largest Spellbinders Labels 14 die to cut out light blue paper.  I then stamped it using Versamark Ink with the Sick? Feel Better Soon stamp from Stampin' Up! Word Play.  I used the Stampin' Up! owl punch to make the nurse and the tree branch is from the Stampin' Up! bird punch.

I really liked the way that the front of the card turned out!!

Inside I stamped Get Well Soon from the Stampin' Up! Tag It set on paper cut out with a label punch.

I also stamped the Sick? Feel Better Soon on the envelope as well.

I again used a Kraft paper card base for this card.  I then embossed pink paper using a clouds embossing folder.  I decorated the bottom with a pastel striped ribbon.

I traced and cut a a circle from light pink paper.  I distressed the edges of the circle and inked the edges with pink ink.  I then punched the owls again using the Stampin' Up! owl punch.  The tree branches are again from the Stampin' Up! bird punch.  The small pink heart is also from the owl punch.

This would make a cute Valentine's Day card, Anniversary card, or just an I Love You card!!

Inside I stamped Guess Who Loves You from Stampin' Up! Owl Together Now stamp set on paper cut out again with the Spellbinder's Labels 14 die set.

I stamped a border of hearts using a stamp that again came with the Stampin' Up! Owl Together Now on the envelope.

And a few more hearts on the back of the envelope as well.

I can't wait to make more cards.  I have so many more ideas I want to try out.  I really enjoyed making these 2 cards today.  Hopefully more to come so I can open up my Etsy shop and start selling them!!  Hopefully someone out there wants to buy them!  Hope you enjoyed these 2 cards today.  Also have some Easter 2x4 projects coming up as well that I'll share when I finish.

Until next time...